Last Friday, a traveler named Mary discovered that her 2,100 photos from a recent boutique tour felt more like a digital burden than a cherished memory. You likely know that exact feeling of being overwhelmed by the sheer volume of images sitting on your memory card after a beautiful getaway. It is completely natural to worry that editing photos from your trip might strip away the raw, authentic magic of the moment or leave you tangled in technical software you don’t have time to master. We believe every photo is a doorway back to a feeling, and you shouldn’t feel stressed about opening it.
I’m here to help you transform those raw holiday snaps into a cohesive visual story that preserves the soul of your journey forever. You’ll learn a streamlined workflow that saves you hours of screen time while ensuring your final album looks polished and magazine-ready for your family to enjoy. We will walk through the best tools for a seamless experience and how to maintain the integrity of your memories without over-processing. #TravelWithLesleyWhyte #GirlsOnTheRoadAgain #WomenInPhotography #SartorialTravellersClub
Key Takeaways
- Learn how to streamline your gallery using a “First Pass” strategy that quickly identifies your absolute favorite shots while clearing the clutter.
- Discover why editing photos from your trip is the essential final step to refining light, enhancing mood, and truly capturing the magic of the moment.
- Evaluate the best tools for your journey, from the convenience of on-the-go mobile apps to the deep creative power of professional desktop software.
- Master the art of a cohesive visual narrative by creating a consistent personal style that ties your diverse travel experiences together into one beautiful story.
- Transform your digital files into high-quality photobooks that serve as modern heirlooms of your adventures. #TravelWithLesleyWhyte #GirlsOnTheRoadAgain #ChathamIslandTours #WomenInPhotography #SartorialTravellersClub #VisitChathamIslands
Why Editing Photos From Your Trip is the Essential Final Step of Your Adventure
Your journey doesn’t actually end when your flight touches down at Auckland Airport. The final stage of any meaningful journey happens at your desk, in what photographers call the digital darkroom. This is where raw captures become refined memories. Think of editing photos from your trip as the bridge between what your camera saw and what your heart felt at the time. A camera is a tool of record, but your editing software is a tool of expression.
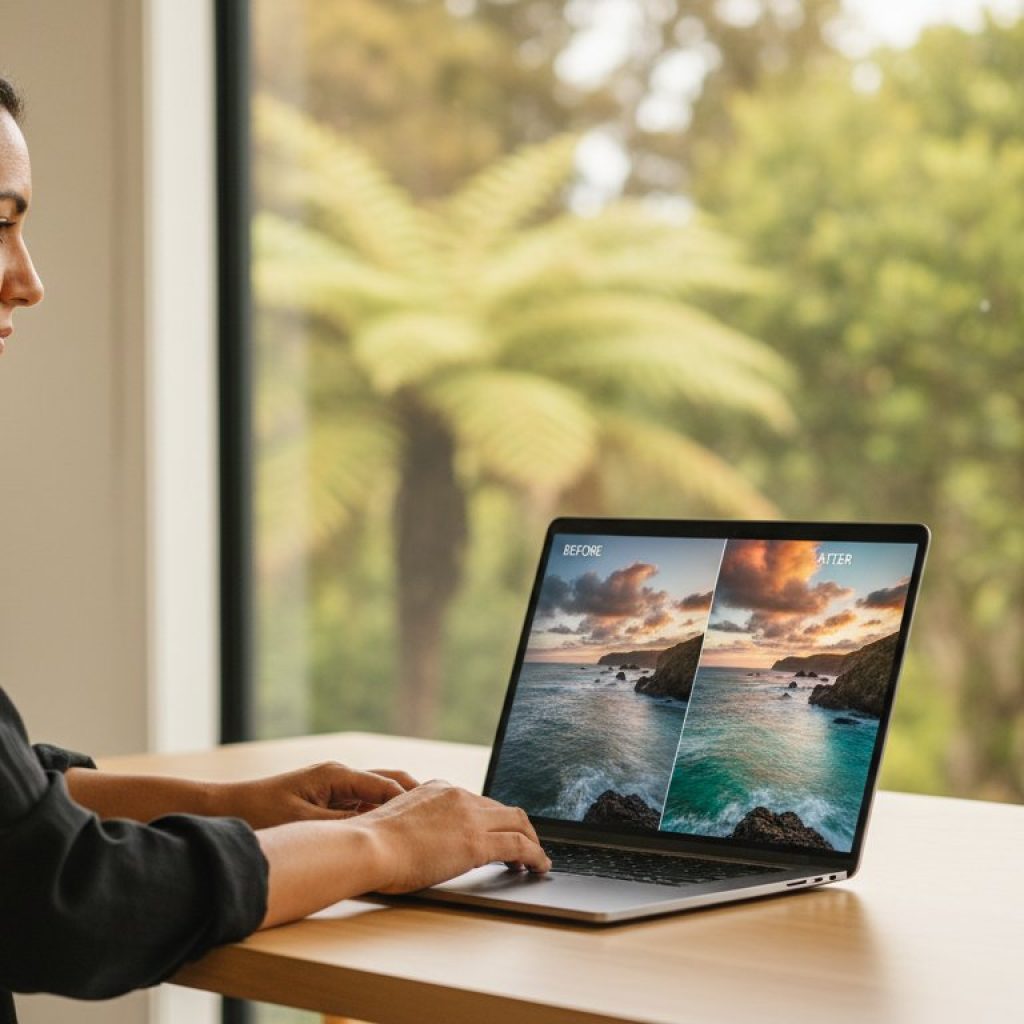
Most images require two distinct layers of attention to truly shine. First, there’s corrective editing, which addresses technical flaws like a tilted horizon or a slightly underexposure shot. Then comes creative editing, where you enhance the mood to match your personal experience. Understanding the processes of altering images allows you to transform a grey, flat RAW file into a vibrant scene that mirrors the golden hour glow you witnessed on a remote beach. This isn’t about faking reality; it’s about restoring the brilliance that the sensor failed to interpret correctly.
There’s a deep psychological reward in this process that many travellers overlook. A 2023 study on travel psychology found that revisiting memories through active engagement, such as culling and processing images, can extend the “vacation high” by up to 14 days. By connecting disparate locations, from the rugged coastlines of the South Island to the quiet, ancient bush of the Chathams, you create a visual narrative. This story binds individual moments into a cohesive legacy that feels like a single, seamless story rather than a folder of random files.
The Shift from Snapshots to Stories
A raw photo rarely captures the true “feeling” of being in a place. Modern digital sensors are designed to capture maximum data, which often results in flat, desaturated files that look nothing like the vivid landscape you remember. Editing helps you emphasize the specific subject you actually cared about, whether it was the intricate texture of a limestone rock or the expression of a local guide. On our Women in Photography tours, we focus heavily on this creative vision. We teach you to look past the initial snapshot to find the story hidden within the frame, ensuring your final gallery reflects your unique perspective.
Editing as a Reflective Practice
The editing process acts as a form of slow travel. It’s a chance to relive the highlights of your journey without the rush of a daily schedule. It’s vital to take the time to curate your collection rather than just storing thousands of files on a hard drive where they’ll never be seen. Photo curation is the deliberate act of choosing the best 10% of your images to represent the whole experience. This discipline ensures your best work isn’t buried under 90% of repetitive or mediocre frames. In our 2024 workshops, we’ve seen that travellers who spend just 30 minutes a day editing photos from your trip report a much higher satisfaction with their final portfolio.
#TravelWithLesleyWhyte #GirlsOnTheRoadAgain #ChathamIslandTours #WomenInPhotography #SartorialTravellersClub #VisitChathamIslands
Mastering the Workflow: Organizing and Culling Your Travel Gallery
Returning from a bespoke journey with a memory card full of potential is an exhilarating feeling. However, the reality of facing 1,500 raw files can quickly turn excitement into a daunting chore. Establishing a meticulous workflow is the first step toward successful editing photos from your trip. You should start with a “First Pass” strategy to clear the digital clutter. Be ruthless during this stage. Delete every blurry frame, accidental shot of the ground, or duplicate where the focus missed the mark. This initial sweep often reduces a gallery size by 30% in less than thirty minutes, leaving you with only the viable contenders.
Once the obvious errors are removed, use a star or flag system within your software. Give your absolute favorites a 5-star rating immediately. These are your “hero” shots, the ones that capture the soul of the experience. Adding metadata while the details are still fresh in your mind is equally vital. Don’t just rely on your memory; record the specific names of local guides or the exact hidden bay where you caught the sunrise. Organize your library with a logical folder structure that makes sense for the long term. A format like “2024-NZ-Chatham-Islands-Adventure” ensures you can retrieve these memories in five or ten years without scrolling through endless generic folders.
The Art of the “Cull”
Less is always more when it comes to storytelling. While it’s tempting to keep all 2,000 frames from a week away, your audience will appreciate a curated selection of 50 to 100 stellar images much more. Be brave about letting go of photos that have high sentimental value but poor technical quality. If a photo of a rare bird is out of focus, it likely won’t make the final cut for a gallery. Grouping your remaining selections by “scene” or lighting condition helps streamline the process when you begin editing photos from your trip. You can find expert travel photography tips on how to narrow down your selection to build a truly cohesive visual narrative.
Backing Up Your Memories
Protect your hard work by following the “3-2-1” backup rule. This means keeping 3 copies of your data on 2 different media types, with 1 copy stored offsite. For example, keep your original files on your laptop and a second copy on a portable SSD. A reliable 1TB Samsung T7 SSD currently costs around NZ$175 at New Zealand retailers and offers excellent durability for transit. Your third copy should live in the cloud via services like iCloud or Google Photos. Never leave your only copy on an SD card during your flight home; these cards are fragile and easily misplaced. For those joining our upcoming photography tours, we often discuss these technical safeguards over a local coffee to ensure your precious memories stay secure from the moment you press the shutter.
#TravelWithLesleyWhyte #GirlsOnTheRoadAgain #ChathamIslandTours #WomenInPhotography #SartorialTravellersClub #VisitChathamIslands
Choosing the Right Tools: Mobile Apps vs. Desktop Software for Travellers
When you’re out in the field, the process of editing photos from your trip often begins long before you touch down back in New Zealand. Modern smartphones and tablets have transformed the “on-the-go” workflow into a professional-grade experience. You don’t need to carry a heavy laptop to the Chatham Islands to see if you captured the light correctly at the Basalt Columns. A lightweight iPad or a high-end smartphone allows you to review, cull, and apply initial edits while the memory of the moment is still fresh. This immediate feedback loop helps you identify if you need to revisit a location the next morning to get the shot right.
Every professional workflow relies on “non-destructive” editing. This technical term simply means the software never overwrites your original image file. Instead, it saves a set of instructions. Whether you’re using a mobile app or a desktop suite, your 24-megapixel RAW file remains untouched. This safety net is vital because it allows you to experiment without fear. If you decide a month later that you over-saturated the blues in a Pacific seascape, you can reset the image to its original state with a single click. In our 2024 workshops, we emphasize that protecting your digital negatives is the first step toward creative freedom.
Best Mobile Apps for Quick Polishing
Adobe Lightroom Mobile stands as the gold standard for travellers. It integrates seamlessly with the Creative Cloud ecosystem, which costs approximately NZ$14.29 per month for the basic photography plan. The real magic lies in the synchronisation. Any edit you make on your phone while waiting for a flight at Tuuta Airport will automatically appear on your desktop computer when you arrive home. It’s a seamless transition that saves hours of manual file management.
Snapseed remains a powerful, free tool that every traveller should install. It excels at selective adjustments. If a stray piece of dust on your sensor created a spot in the clear sky above Kaingaroa, the “healing” tool in Snapseed can remove it in about five seconds. It offers a level of precision that is rare for a free application, making it a staple for quick fixes before sharing images with your community.
VSCO is the preferred choice for those seeking a film-like aesthetic. It provides a nostalgic trip feel through presets that mimic classic film stocks like Kodak or Fujifilm. For many in our Sartorial Travellers Club, VSCO offers the perfect balance between modern digital clarity and the warm, grainy texture of traditional travel photography. It’s less about technical perfection and more about capturing an emotive atmosphere.
Professional Desktop Solutions
Adobe Lightroom Classic is the heartbeat of the Women in Photography community. While the mobile app is great for speed, the desktop version offers the deep organisational tools required for managing thousands of images. It allows you to keyword your photos, making it easy to find that one specific shot of a Kōpi tree from three years ago. The precision of a mouse and a large calibrated monitor ensures your prints look exactly as intended.
Capture One offers superior colour grading that many landscape photographers prefer. If you’re editing photos from your trip that feature the complex greens of New Zealand’s native bush or the subtle teals of the ocean, Capture One’s colour editor provides more granular control than almost any other software. It’s a sophisticated tool for those who want to push their creative boundaries.
Luminar Neo has changed the game by using AI to simplify complex tasks. If a power line ruins the view of a historic 1860s stone cottage, Luminar Neo can remove it automatically. It also features “Sky AI,” which can subtly enhance a flat, grey sky to better reflect the mood you experienced on the day. It’s an efficient way to achieve professional results without spending hours on manual masking.
Presets should be viewed as a starting point rather than a final destination. Around 85% of professional photographers use presets to establish a consistent look across a series of images. However, every photo has unique lighting. Use a preset to get 70% of the way there, then manually adjust the exposure and white balance to ensure the final result feels authentic to your personal journey.
#TravelWithLesleyWhyte #GirlsOnTheRoadAgain #ChathamIslandTours #WomenInPhotography #SartorialTravellersClub #VisitChathamIslands
How to Create a Cohesive Visual Narrative: Editing for Style and Story
Editing photos from your trip is about more than just fixing mistakes; it’s about intentional curation. To build a professional-looking gallery, you need to define a personal style that acts as a visual thread. You might prefer a bright and airy aesthetic that emphasizes the soft, coastal light found at Waitangi Bay. Alternatively, a moody and dramatic approach might better capture the rugged, prehistoric textures of New Zealand’s misty back country. Your choice of style dictates the emotional response of your audience.
Achieving colour consistency is the secret to a polished portfolio. You want a photo from the remote Chatham Islands to feel like it belongs in the same collection as a shot from the South Island. This doesn’t mean every landscape must look identical. Instead, use a consistent colour palette across the series. If you favour warm, golden highlights in your Chatham Island landscapes, carry that specific warmth into your South Island mountain shots. This creates a sense of place and continuity even when the geography changes.
Practical unification starts with white balance and exposure. When you synchronise these two elements, the viewer’s eye glides effortlessly from one image to the next without being jarred by shifting tints. Use a neutral point to set your white balance; this prevents one shot from looking too blue while the next looks overly yellow. Professional intent is also shown through precise cropping and levelling. A tilted horizon line is a hallmark of an amateur snapshot. By carefully levelling every frame, you signal that every element in the photo was placed there with purpose.
The Power of Batch Editing
When you capture a sequence like a sunset at Muriwai Beach, you likely have 50 or 60 similar frames. Don’t edit these one by one. Apply your base adjustments to the strongest image and then “sync” those settings to the rest of the set. Batch editing saves approximately 70% of total post-processing time. Once the batch is applied, spend a few moments fine-tuning individual shots. You must pay close attention to skin tones; what looks beautiful on a black sand beach might make a person’s face look unnaturally orange or desaturated. Always check your portraits last.
Telling a Story Through Sequence
A great travel narrative requires visual variety. Mix wide-angle landscapes that establish the location with intimate detail shots of local flora or weathered textures. Candid portraits add the human element that makes a journey feel authentic. Identify your “Hero Shot,” which is the one breath-taking image that defines the entire trip. Surround it with “Supporting Shots” that provide context and depth. These supporting images should be edited with slightly less contrast or saturation so they don’t compete for attention with your hero. Our Women in Photography tours teach these specific storytelling techniques to help you move beyond single snapshots into cohesive visual essays.
Ready to capture your own story? Join us for a seamless adventure where we handle the details while you focus on the light.
#TravelWithLesleyWhyte #GirlsOnTheRoadAgain #ChathamIslandTours #WomenInPhotography #SartorialTravellersClub #VisitChathamIslands
Preserving Your Journey: From Digital Files to Tangible Keepsakes
The process of editing photos from your trip doesn’t actually end when you close your laptop or put down your tablet. A digital file is a ghost; it lives in a folder, often forgotten among thousands of other snapshots. Your photographic journey only reaches its full potential when those pixels transform into something you can hold. There’s a profound psychological shift that happens when you move an image “off the screen.” It stops being data and starts being a memory you can revisit without the distraction of notifications or low battery warnings.
High-quality photobooks have seen a massive resurgence lately, evolving into modern family heirlooms. Unlike the plastic-sleeve albums of the 1990s, today’s books use archival papers and lay-flat binding that can last for decades. Choosing the right finish is a critical final step in your creative workflow. If your trip featured the rugged, textured landscapes of the Chatham Islands, a matte finish is often the best choice. It eliminates glare and provides a sophisticated, painterly feel. Conversely, if your journey was filled with the vibrant street life of a bustling city, a glossy or “lustre” finish can make those colours pop with extra depth and contrast.
Preparing your files for large-scale printing requires a meticulous eye. Most screens display images at 72 or 96 dots per inch (DPI), but a professional print requires 300 DPI to look sharp. If you’re planning an A3 wall print (29.7 x 42.0 cm), you need a file that is at least 3500 x 4900 pixels. You’ll also want to apply a final round of “output sharpening.” Prints naturally lose a bit of perceived sharpness because ink bleeds slightly into the paper fibres, so your file should look a tiny bit over-sharpened on your screen before you send it to the lab.
- Resolution Rule: Aim for 300 DPI for all physical prints to avoid pixelation.
- Paper Choice: Use Matte for landscapes and Glossy for high-contrast, colourful subjects.
- Test Prints: Always order a single test print before committing to a 100-page book.
Designing the Perfect Photobook
Give your best images room to breathe. A common mistake is crowding five or six photos onto a single page. Try placing one stunning landscape on the right-hand page and leaving the left page entirely white or featuring a small, meaningful caption. Include journal entries or the names of local guides to provide context. For premium Kiwi-made quality, Auckland-based Milk Books offers exquisite linen covers, while Diamond Photo provides reliable, cost-effective options for New Zealand travellers.
Sharing Your Story Digitally
When you’re ready to share editing photos from your trip online, remember that platforms like Facebook and Instagram use aggressive compression. To keep your images crisp, export them at 2048 pixels on the long edge for Facebook. For our Girls on the Road Again community, consider setting up a private gallery on a site like Pixieset. This allows your travel companions to download high-resolution versions for their own use, ensuring everyone has a beautiful record of the shared adventure.
We can’t wait to see the world through your lens. Please share your favourite edits with our community using the following hashtags:
Turn Your Captured Moments Into Timeless Stories
Your journey doesn’t end when you step off the plane and unpack your bags. By refining your workflow through meticulous culling and choosing the right software for your specific style, you transform raw files into a cohesive visual narrative. Remember that editing photos from your trip is the essential final step that breathes life into your memories. It’s the difference between a forgotten folder on a hard drive and a stunning gallery that tells your unique story for years to come.
If you’re eager to sharpen your eye and gain confidence behind the lens, we invite you to take the next step. You can join our next Women in Photography tour and master your camera in the wild. These journeys are personally escorted by award-winning photographers who provide hands-on guidance in a supportive, small-group environment of just 8 to 10 women. We explore authentic New Zealand landscapes and breathtaking global destinations, ensuring you’re always in good hands while you learn. It’s a chance to connect with like-minded travellers and return home with images you’re truly proud of. We can’t wait to help you capture your next great adventure.
#TravelWithLesleyWhyte #GirlsOnTheRoadAgain #ChathamIslandTours #WomenInPhotography #SartorialTravellersClub #VisitChathamIslands
Frequently Asked Questions
Is it better to edit photos on my phone or a computer?
Editing on your phone is perfect for quick sharing, while a computer provides the precision needed for large prints. Mobile apps like Lightroom CC allow you to start an edit on the bus and finish it on your laptop later. Since 85% of travellers now share photos instantly, phone editing is often the most practical choice for our tours. Use a computer if you plan to frame a large landscape from the Chatham Islands.
What is the most important setting to adjust when editing travel photos?
Exposure is the most critical setting because it dictates the mood and clarity of your image. You should aim to balance the brightness so you don’t lose detail in the bright New Zealand sky. Lowering highlights by 15% to 30% often reveals hidden textures in clouds or white sand. This simple adjustment ensures your photos feel professional and well-balanced without requiring complex technical skills.
How do I avoid making my travel photos look “fake” or over-processed?
The best way to keep things natural is to apply your desired filter or adjustment and then slide the intensity back to 50%. Over-saturation is a common mistake that makes editing photos from your trip look artificial. Stick to subtle changes that reflect what your eyes actually saw in the moment. If the grass looks neon green, you’ve definitely gone too far with the sliders.
Should I shoot in RAW or JPEG for my holiday photos?
You should shoot in RAW if you want maximum control over shadows and highlights later. A RAW file holds 12 to 14 bits of data, compared to just 8 bits in a standard JPEG. This extra information is vital when you’re capturing high-contrast scenes like a sunset over the Pacific. If storage space is tight on your 64GB SD card, JPEG is a fine secondary choice for casual snaps.
How much time should I realistically spend editing photos from a one-week trip?
Budget roughly 60 minutes for every full day of shooting to keep your workload manageable. For a standard 7-day adventure, this means spending about 7 hours total on your final selection. It’s much easier to edit in small bursts rather than facing a mountain of 2,000 images when you get home. We find that picking your top 10 each evening keeps the process fun and rewarding.
Can I edit my photos while I am still on the tour, or should I wait until I get home?
It’s best to do a first pass edit while the memories are fresh in your mind. Capturing the emotion of a moment is easier when you remember the exact light and feeling of the day. Many of our Women in Photography guests enjoy editing together during a relaxed evening coffee. Save the heavy retouching or complex Photoshop work for your home office where you have a calibrated monitor.
What are the best free photo editing apps for beginners?
Snapseed and Lightroom Mobile are the top choices for editing photos from your trip without spending a cent. Snapseed offers powerful selective tools that let you brighten just one part of your photo. Lightroom’s free version includes professional-grade light and colour controls that are very intuitive. These apps are available on the NZ App Store and work beautifully on both iPhones and Android devices.
How do I organize thousands of photos so I can actually find them later?
Organize your files using a Year-Month-Event folder structure to ensure you never lose a memory. For example, name a folder 2024-11-Chatham-Islands so it stays in chronological order. Use the star or heart rating system in your gallery to flag the best 5% of your shots immediately. This narrows down a massive library of 1,500 photos to a curated collection of 75 highlights you’ll actually want to show friends.
#TravelWithLesleyWhyte #GirlsOnTheRoadAgain #ChathamIslandTours #WomenInPhotography #SartorialTravellersClub #VisitChathamIslands